对于广大“钢铁直男”的程序员来说,送什么礼物给女朋友一直是个世纪难题。
其实哄女朋友开心最深的套路就是花式送口红,就问谁抵挡得住啊啊啊啊......
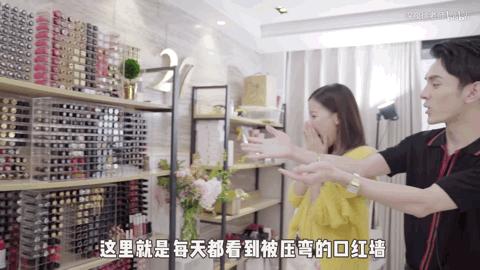
“没有什么问题是一支口红解决不了的,如果有,那就两支。”于是,直男们纷纷开始各种买口红、送口红……
毕竟李佳琦一句"OMG买它”,女朋友披头散发抢购,钱包就空了一半。

但是,口红色号千千万,选对了牌子才成功了一半。
快乐橙、伤心紫,姨妈红,鸡屎绿…直男眼里没什么区别的颜色,在女生眼里各种色调、质地细微的区别都能分析一清二楚。
那么,对于直男来说,怎么才能搞清楚如此多的口红色号呢?
我耗费一毫米发际线,琢磨了一下,做出了一个口红色号识别器,希望能帮大家在关键时刻把深刻的革命友谊再升华一下。
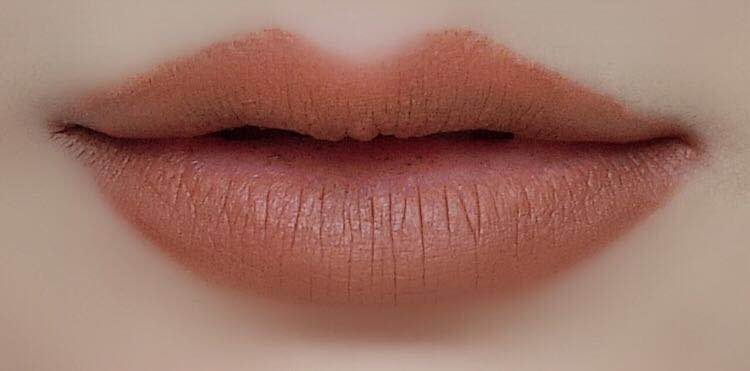
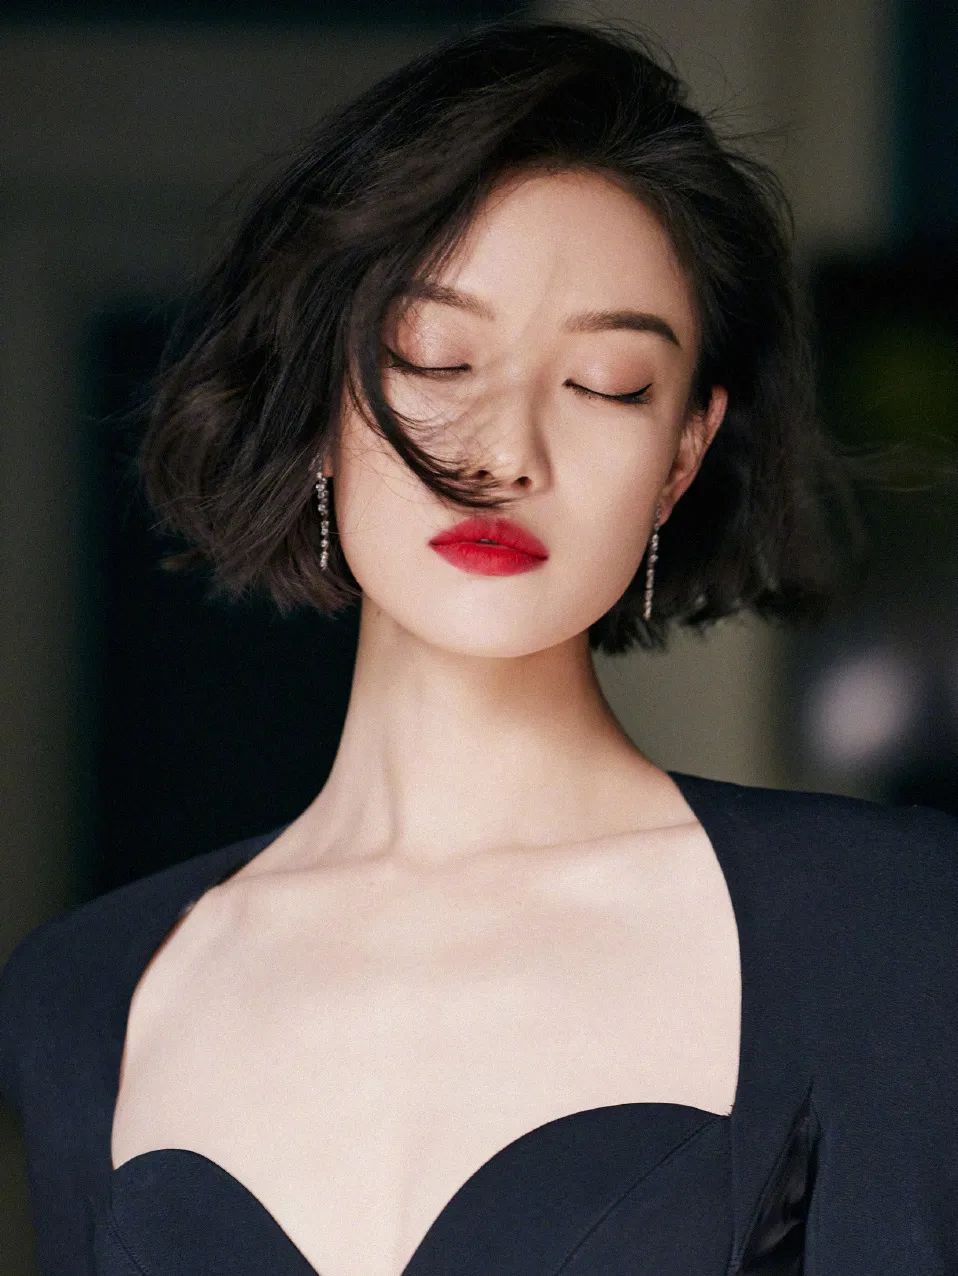
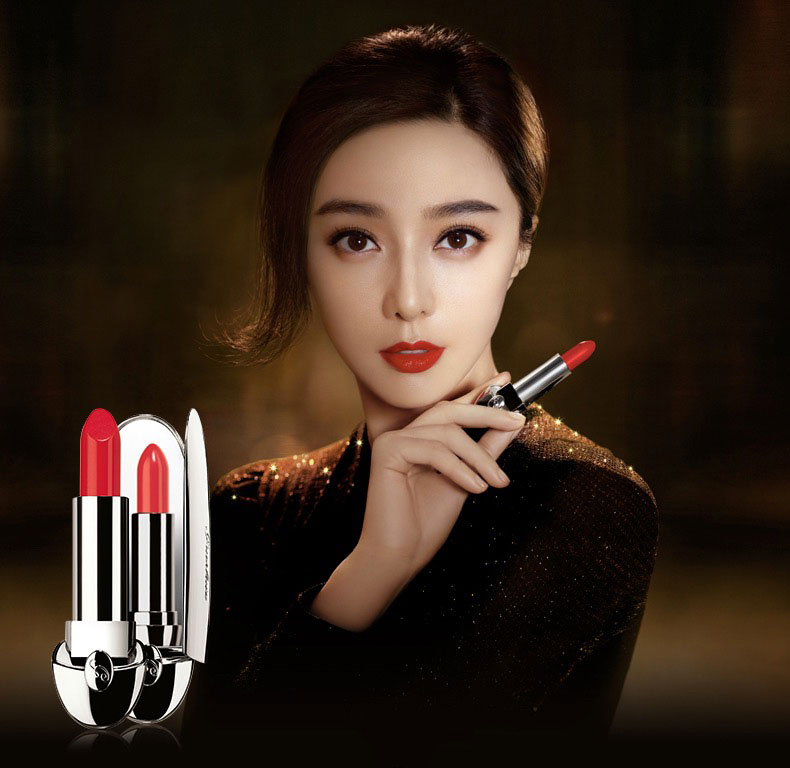
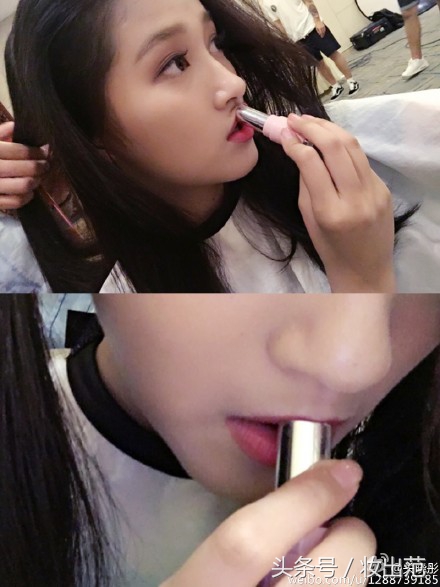
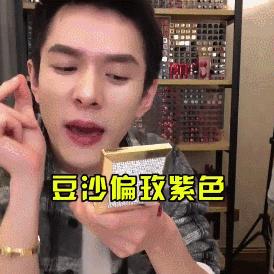
先来看看效果。让我们假设,小姐姐发来了一张美妆博主的美照,并暗示你,“人家也喜欢这个颜色。”
图片来自网络
这个时候,用我们的口红色号识别器,就能定位嘴唇,并迅速给出它的颜色隶属哪家品牌的哪个色号。
OMG!简直比李佳琦还准确!

好啦,废话不多说,马上开始教学时间!
来自 Github 的口红色号宇宙
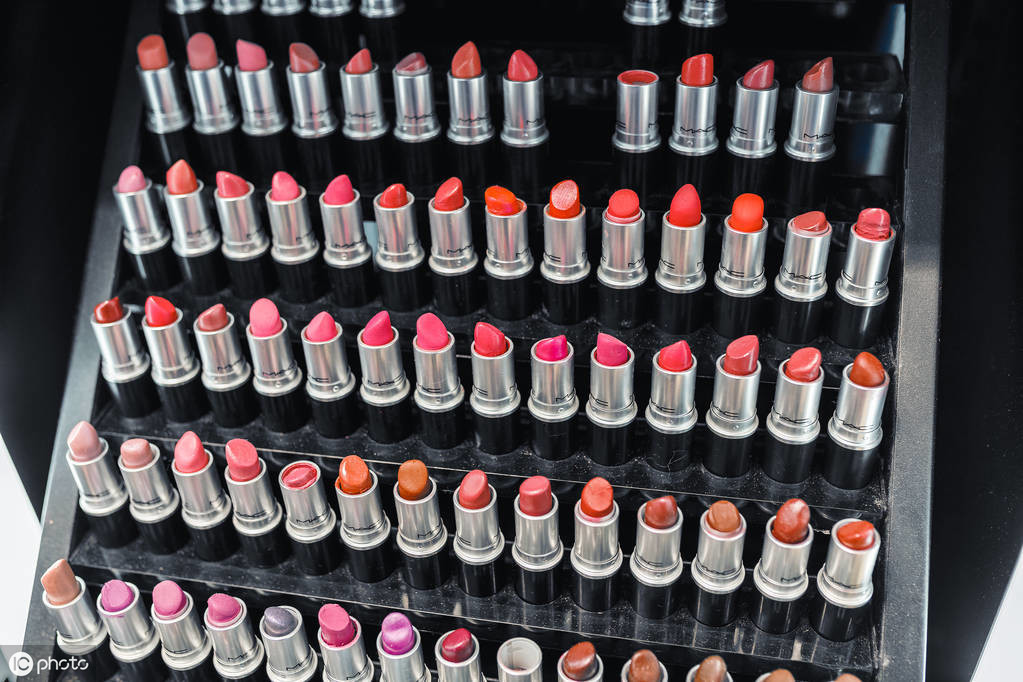
要想识别口红色号,先得让机器知道到底都有哪些颜色。
听柜姐介绍,红色系有:“草莓红、铁锈红、枫叶红...”,其他还有“豆沙色、吃土色、番茄色...”
世界观还未建立完全就要开始土崩瓦解,这看着有区别吗?“豆沙色最为百搭,橘调的番茄色比较显白...”眼前的黑不是黑,你说的红是什么红?
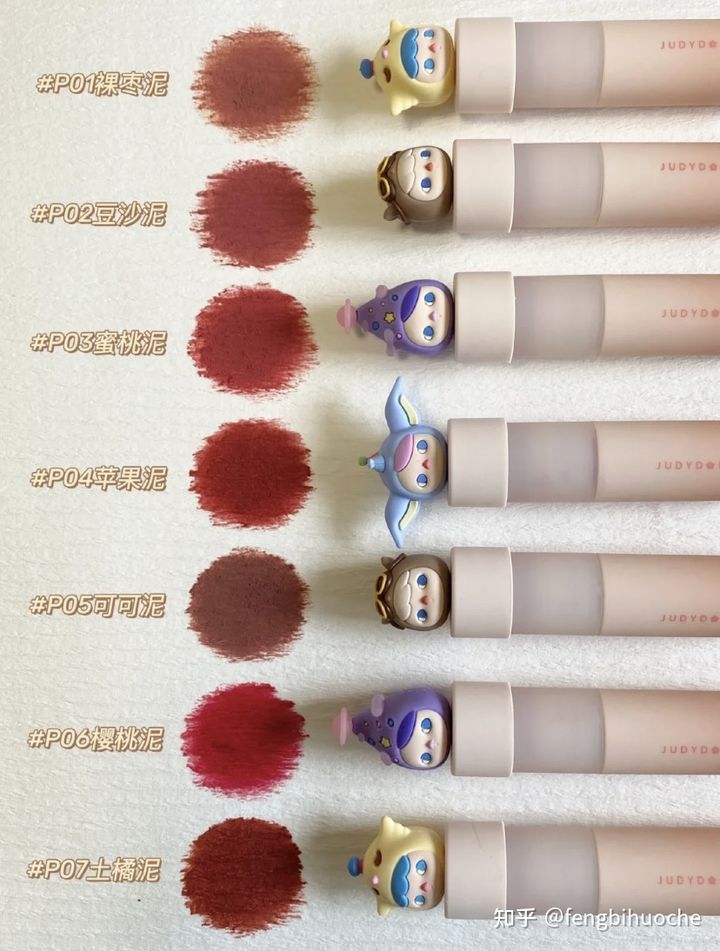
还好,在万能的 Github 上找到了一个宝藏数据库“口红颜色可视化”,这个数据库堪比口红的色号宇宙,不仅囊括了当前最主流品牌的各种系列色号,还很良心的在色盘上排列了出来。
这个数据集是一个嵌套的字典数据结构,存为 json 串的形式,里面记录了每个口红品牌系列下不同口红色号的颜色 id、名称、和 16 进制颜色值。
直!男!救!星!有木有!
口红色号可视化链接:
//p1-tt.byteimg.com/origin/pgc-image/4aae509ce3db4ca9ad101008ce25db17.jpg" style="width: 650px;">
傻傻分不清的我对 5 个品牌的不同系列做了一下统计和色号录入,于是,剩下的就交给计算机啦。
先用番茄做个实验?
既然有了如此完备的色号数据库,那么文摘菌就有了一个讨巧的方法:要想找到合适的色号,可以直接截取颜色,然后在数据库中进行比对。
这个方法非常好操作,在上唇色之前,我们不如先拿别的红色物品来练手。
比如,这里有一只番茄图片,你看这个番茄它又大又圆:
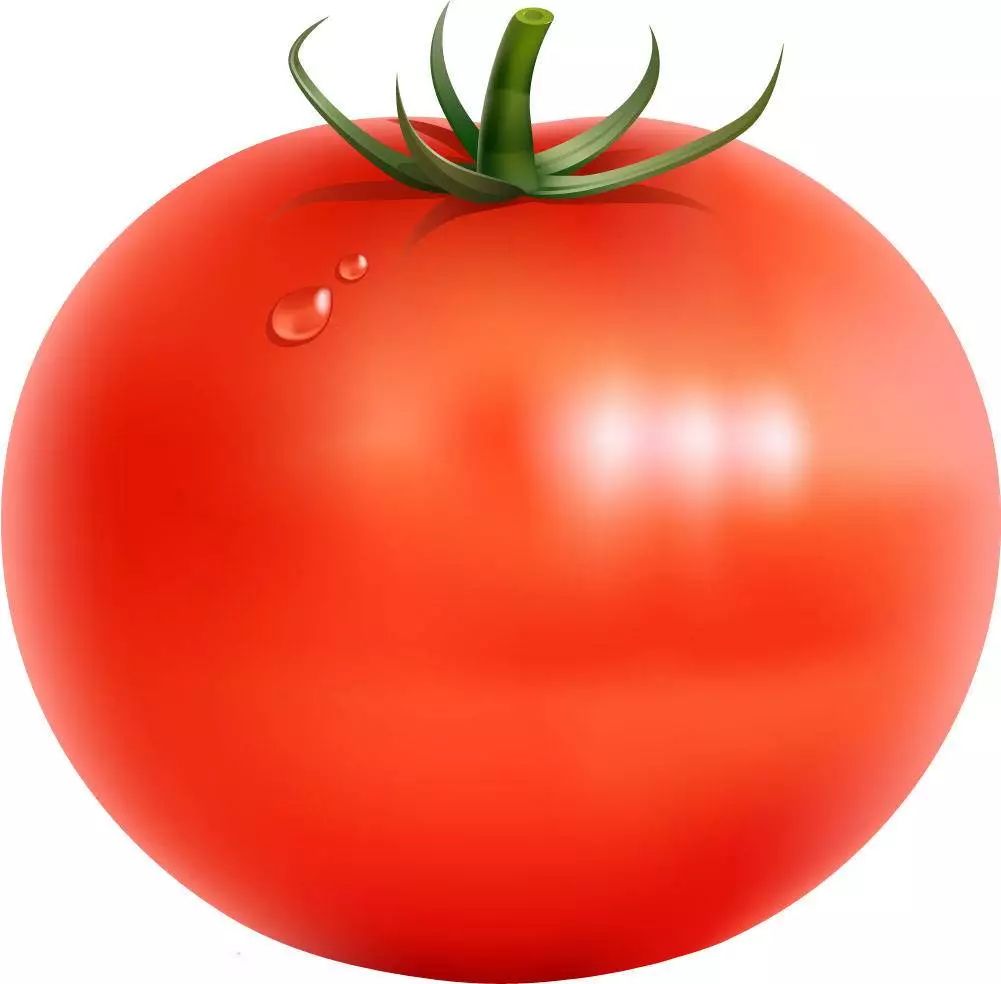
在其中截取了成色均匀、无高亮的矩形图片:

提取这张纯色图片的 RGB 值在技术上是可行的,getcolor.py 代码如下:
import colorsys\nimport PIL.Image as Image\ndef get_dominant_color(image):\n max_score = 0.0001\n dominant_color = None\n for count,(r,g,b) in image.getcolors(image.size[0]*image.size[1]):\n # 转为HSV标准\n saturation = colorsys.rgb_to_hsv(r/255.0, g/255.0, b/255.0)[1]\n y = min(abs(r*2104+g*4130+b*802+4096+131072)>>13,235)\n y = (y-16.0)/(235-16)\n #忽略高亮色\n if y > 0.9:\n continue\n score = (saturation+0.1)*count\n if score > max_score:\n max_score = score\n dominant_color = (r,g,b)\n return dominant_color\n
为了减少误差,需要裁剪多个不同位置的图片,保存在本地的一个文件夹中,读取文件,提取颜色,求平均值,得到的番茄最终的 RGB 颜色,代码如下:
import os\nimport getcolor\nfrom os.path import join as pjoin\nfrom scipy import misc\ndef load_color(color_dir,list): \n count = 0\n for dir in os.listdir(color_dir): \n img_dir = pjoin(color_dir, dir) \n image = getcolor.Image.open(img_dir)\n image = image.convert('RGB')\n get=getcolor.get_dominant_color(image)\n list.append(get)\n count = count+1\n #print(person_dir)\n #print(count)\n return count\ndef Mean_color(count,list):\n Mean_R=Mean_G=Mean_B=0\n for i in range(count):\n tuple=list[i]\n Mean_R+=tuple[0]\n Mean_G+=tuple[1]\n Mean_B+=tuple[2]\n MeanC=((int)(Mean_R/count),(int)(Mean_G/count),(int)(Mean_B/count))\n return Me\n
番茄的颜色提取到了,那么和什么做比对呢?
当然是口红的数据,文摘菌这儿用到了 5 个品牌,分别是圣罗兰、香奈儿可可小姐、迪奥、美宝莲、纪梵希,共 17 个系列,271 个口红色号。
数据集是一个嵌套的字典数据结构,存为 json 串的形式,里面记录了每个口红品牌系列下不同口红色号的颜色 id、名称、和 16 进制颜色值。
lipstick.json部分数据集展示如下:
{"brands":[{"name":"圣罗兰","series":\n[{"name":"莹亮纯魅唇膏","lipsticks":\n[{"color":"#D62352","id":"49","name":"撩骚"},\n{"color":"#DC4B41","id":"14","name":"一见倾心"},\n{"color":"#B22146","id":"05","name":"浮生若梦"},\n
数据集中存储的 RGB 颜色是 16 进制的字符串形式,需要将其转换成 RGB 值,比较两个颜色相近与否。
实际上是比较 RGB 三个分量维度上的误差,最小的口红输出对应的品牌、系列、色号和 id。
代码如下:
import json\nimport getcolor\nimport numpy as np\nimport lipcolor\n#filename = 'temp.txt'\n##write the temp data to file##\ndef WtoFile(filename,RGB_temp):\n num=len(RGB_temp)\n with open(filename,'w') as f: \n for i in range(num):\n s = str(RGB_temp[i]).replace('[','').replace(']','')\n f.write(s)\n f.write("\\n")\n#operate the data #\n##save the brand&series&color id&color name to sum_list##\n##covert the color #D62352 to RGB_array##\n##caculate the RGB difference to RGB_temp and write the value to file##\ndef data_operate():\n with open('lipstick.json', 'r', encoding='utf-8') as f:\n ret_dic = json.load(f)\n #print(ret_dic['brands'])\n #print(type(ret_dic)) # <class 'dict'>\n #print(ret_dic['brands'][0]['name']) \n b_num=len(ret_dic['brands'])\n #print(b_num)#brands number\n s_list=[]\n #series brands#\n for i in range(len(ret_dic['brands'])):\n s_num=len(ret_dic['brands'][i]['series'])\n s_list.append(s_num)\n #print("{0} has {1} series".format((ret_dic['brands'][i]['name']),(s_list[i])))\n #the lipstick color of every brands every series#\n #the first loop calculate the total color numbers\n sum=0\n for b1 in range(b_num):\n for s1 in range(s_list[b1]):\n brand_name=ret_dic['brands'][b1]['name']\n lip_name=ret_dic['brands'][b1]['series'][s1]['name']\n color_num=len(ret_dic['brands'][b1]['series'][s1]['lipsticks'])\n sum+=color_num#calculate the total color numbers\n #the second loop save the message to a list#\n sum_list=np.zeros((sum,4), dtype=(str,8))\n value_array=np.zeros((sum,6), dtype=int)\n i=0 \n for b2 in range(b_num):\n for s2 in range(s_list[b2]):\n brand_name=ret_dic['brands'][b2]['name']\n #print(type(brand_name))\n lip_name=ret_dic['brands'][b2]['series'][s2]['name']\n color_num=len(ret_dic['brands'][b2]['series'][s2]['lipsticks'])\n for c in range(color_num):\n color_value=ret_dic['brands'][b2]['series'][s2]['lipsticks'][c]['color']\n color_name=ret_dic['brands'][b2]['series'][s2]['lipsticks'][c]['name']\n color_id=ret_dic['brands'][b2]['series'][s2]['lipsticks'][c]['id']\n #print("{0} series {1} has {2} colors,color {3}:{4}".format(brand_name,lip_name,color_num,c+1,color_name))\n sum_list[i][0]=brand_name\n sum_list[i][1]=lip_name\n sum_list[i][2]=color_id\n sum_list[i][3]=color_name\n #value_array[i]=value_array[i][1]\n #convert "#D62352" to [13 6 2 3 5 2]#\n for l in range(6):\n temp=color_value[l+1]\n if(temp>='A'and temp<='F'):\n temp1=ord(temp)-ord('A')+10\n else:\n temp1=ord(temp)-ord('0')\n value_array[i][l]=temp1\n i+=1\n #the third loop covert value_array to RGB_array#\n RGB_array=np.zeros((sum,3), dtype=int)\n for i in range(sum):\n RGB_array[i][0]=value_array[i][0]*16+value_array[i][1]\n RGB_array[i][1]=value_array[i][2]*16+value_array[i][3]\n RGB_array[i][2]=value_array[i][4]*16+value_array[i][5]\n #calculate the similar and save to RGB_temp\n #RGB_temp=np.zeros((sum,1), dtype=int)\n RGB_temp=np.zeros((sum,1), dtype=float)\n for i in range(sum):\n R=RGB_array[i][0]\n G=RGB_array[i][1]\n B=RGB_array[i][2]\n RGB_temp[i]=abs(get[0]-R)+abs(get[1]*3/4-G)+abs(get[2]-B)\n RGB_temp.tolist();#covert array to list\n #print(RGB_temp)\n filename="temp.txt"\n WtoFile(filename,RGB_temp)\n #sort the RGB_temp#\n result=sorted(range(len(RGB_temp)), key=lambda k: RGB_temp[k])\n #print(result)\n #output the three max prob of the lipsticks#\n print("The first three possible lipstick brand and color id&name are as follows:")\n for i in range(3):\n idex=result[i]\n print(sum_list[idex])\n print("The first three possible lipstick brand RGB value are as follows:")\n for i in range(3):\n idex=result[i]\n R=RGB_array[idex][0]\n G=RGB_array[idex][1]\n B=RGB_array[idex][2]\n tuple=(R,G,B)\n print(tuple)\nif __name__ == '__main__':\n #image = getcolor.Image.open(inputpath)\n #image = image.convert('RGB')\n #get=getcolor.get_dominant_color(image)#tuple #get=(231, 213, 211)\n list=[]\n color_dir="output"\n count=lipcolor.load_color(color_dir,list)\n get=lipcolor.Mean_color(count,list)\n print("the extracted RGB value of the color is {0}".format(get))\n #operate the data#\n data_operat\n
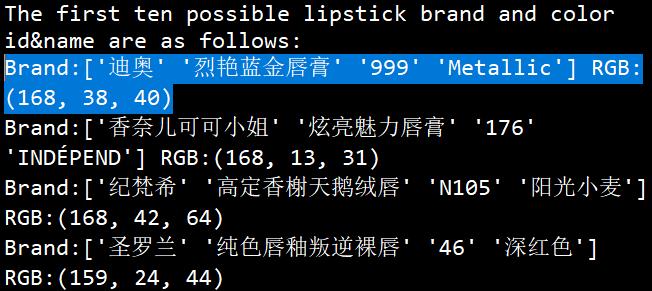
输出最有可能吻合番茄颜色的前三个口红的信息,然后在 Spyder 中的运行结果:
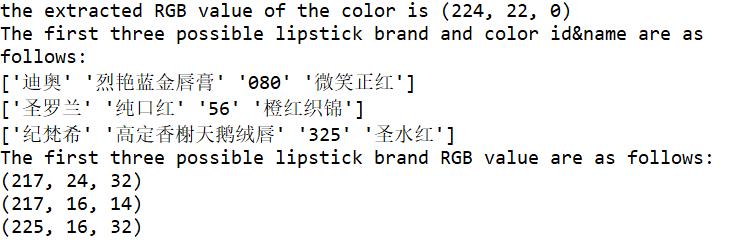
可以看到最有可能的三个口红品牌色号的 RGB 值与番茄的 RGB 值是非常接近的。
提取到的番茄颜色:

'迪奥' '烈艳蓝金唇膏' '080' '微笑正红’的颜色:

'圣罗兰' '纯口红' '56' '橙红织锦'的颜色:

'纪梵希' '高定香榭天鹅绒唇' '325' '圣水红'的颜色:

我已经眼花缭乱,三个颜色……有区别吗?!以后不如准备统一叫它们,番茄色!

不过,这也正说明了,刚刚的提取&对比方法可行!
既然可以识别番茄的颜色,那么,可以识别人像中的口红色号吗?
进入正题!人像口红色号识别
接下来,我们需要做的是输入一张人像图片,可以自动识别其中的嘴唇区域,并提取出嘴唇区域中的一部分做为颜色提取的源图像。
这里就要用到 CV 的人脸识别了,还好 Dlib 库又帮助我们减轻一大部分的工作量。
Dlib 中有自带的 68 个人脸的识别器,可以得到人脸部位包括眉毛、眼睛、鼻梁、面部轮廓和嘴唇区域的具体点的位置,到这儿,我以为很轻松就可以截到嘴唇区域了,结果有点尴尬.........
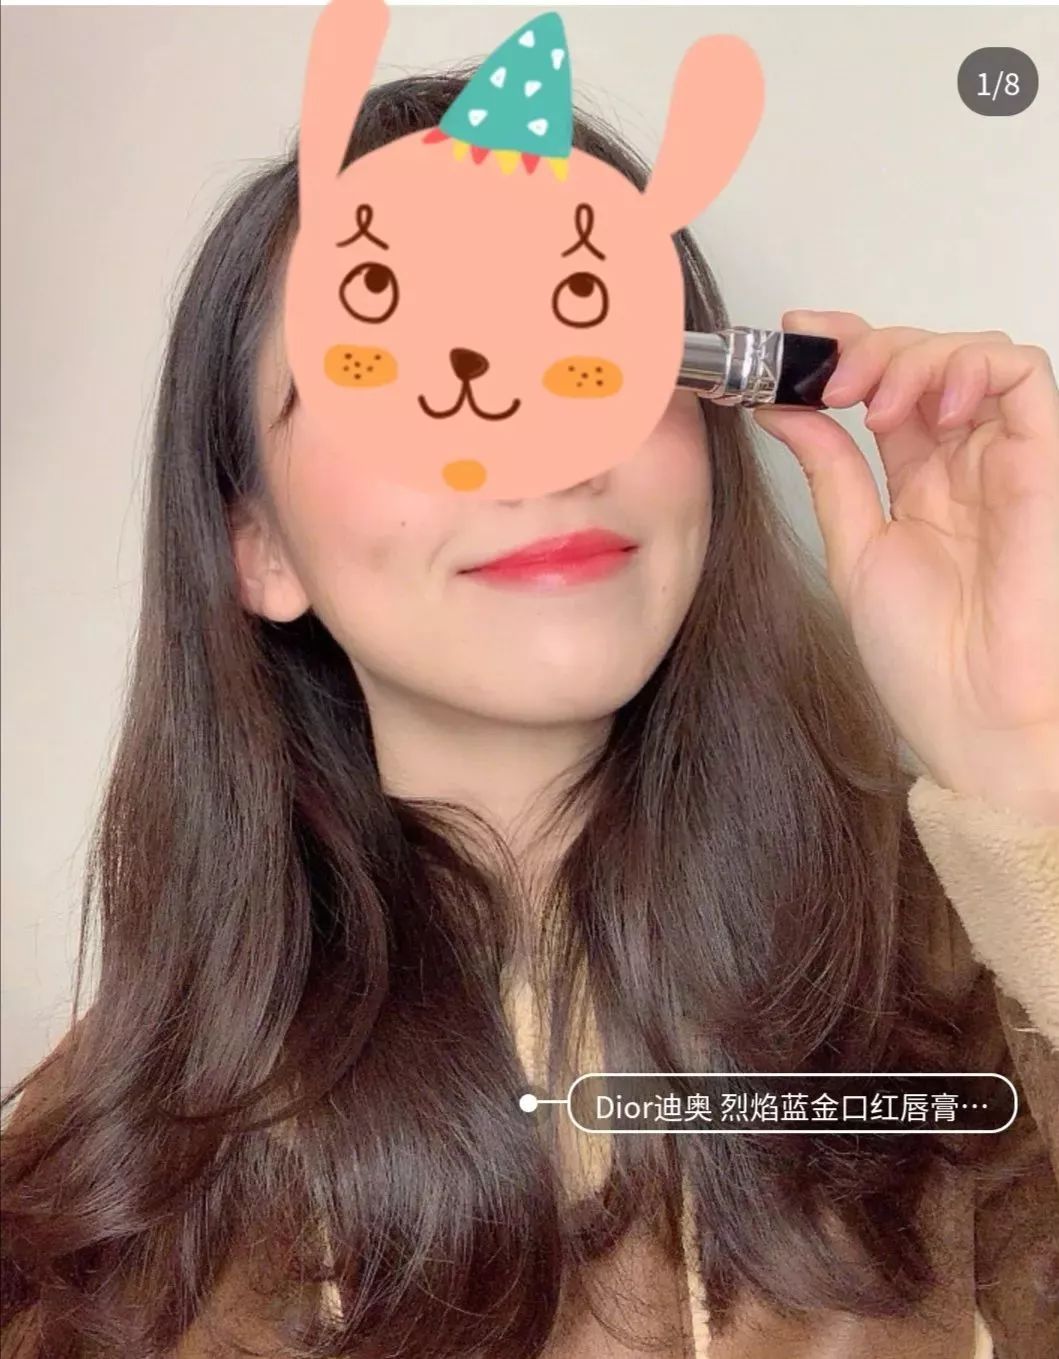
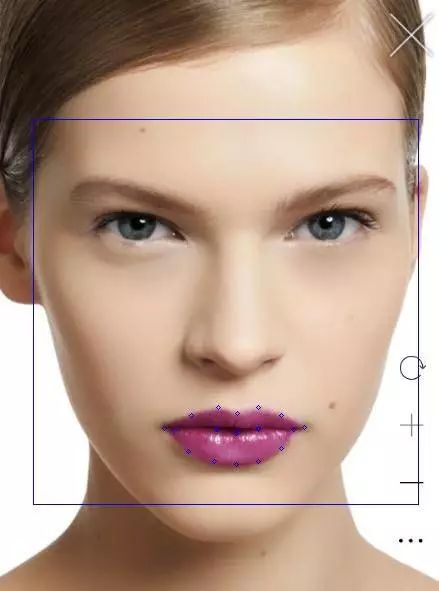
我们首先找到了一张小姐姐的照片:

截取到的嘴唇区域如下:

很明显的看到上下嘴唇黑色的区域也截取到了,这对后续的提色有影响,所以不得不回到最初的 68 个检测点来思考人生。

圣罗兰官网 #842C71 口红
标记的 68 个人脸检测点如上图所示,而嘴唇部位是从第 49 个标记点开始的(数组的话,下标是 48)。
为了尽可能的截取到均匀成色的嘴唇片段,刚开始是想从第 50 个标记点对角线截取到第 56 个标记点,而这不可避免的会截取到上下嘴唇之间的缝隙,这儿的阴影也会影响后续的颜色提取准确度。
考虑到下嘴唇比上嘴唇宽,所以截取到下嘴唇中间的两个小正方形区域:


人脸识别和截取嘴唇区域的代码如下:
import numpy as np \nimport cv2\nimport dlib\nfrom PIL import Image\ndef crop(source,pos):\n x1=pos[2][0]\n y1=pos[2][1]\n x2=pos[1][0]\n y2=pos[1][1]\n d=abs(x2-x1)\n region = source[(int)(y1-d*0.75):y2,x1:x2]\n # save the image\n cv2.imwrite("output/Mouth1.jpg", region)\n x1=pos[1][0]\n y1=pos[1][1]\n x2=pos[0][0]\n y2=pos[0][1]\n d=abs(x1-x2)\n region = source[y1-d:y2,x1:x2]\n # save the image\n cv2.imwrite("output/Mouth2.jpg", region)\ndef detect_mouth(img,pos):\n gray = cv2.cvtColor(img, cv2.COLOR_BGR2GRAY)\n gray = cv2.equalizeHist(gray)\n detector = dlib.get_frontal_face_detector()\n #use the predictor \n predictor = dlib.shape_predictor('shape_predictor_68_face_landmarks.dat')\n dets = detector(img, 1) \n print("Number of faces detected: {}".format(len(dets)))\n for a in dets: \n cv2.rectangle(img,(a.left(),a.top()),(a.right(),a.bottom()),(255,0,0))\n #point_list=[]#save the mouth point to point_list[]#\n #Extract 68 feature points of the face and crop the lip image#\n for index, face in enumerate(dets):\n print('face {}; left {}; top {}; right {}; bottom {}'.format(index, face.left(), face.top(), face.right(), face.bottom()))\n shape = predictor(gray, face)\n for i, pt in enumerate(shape.parts()):\n #print('Part {}: {}'.format(i, pt))\n #print(i)\n pt_pos = (pt.x, pt.y)\n if i>=48 and i<=67:\n cv2.circle(img, pt_pos, 2, (255, 0, 0), 1)\n if i>=56 and i<=58:\n #print(pt_pos)\n pos[i-56][0]=pt.x\n pos[i-56][1]=pt.y\n #cv2.circle(img, pt_pos, 2, (255, 0, 0), 1)\n return img\nif __name__ == "__main__": \n img = cv2.imread("test3.png")\n #copy the input image for the later crop#\n img_clone = np.copy(img)\n cv2.imwrite("input/source.jpg",img_clone)\n #save the lip position to pos array#\n pos=np.zeros((3,2), dtype=int)\n result=detect_mouth(img,pos)\n cv2.imwrite("input/source2.jpg",result)\n #crop the lip areas#\n source = cv2.imread("input/source.jpg")\n crop(source,pos)\n # show the result\n cv2.imshow('FaceDetect',result)\n cv2.waitKey(0) \n cv2.destroyAllWindow\n
既然已经截取到嘴唇的小矩形图像了,接下来的工作就和前面一样了,在数据库中对比每个 RGB 值输出最小误差对应的口红信息,而这儿也有难到我。
单纯的比对 RGB 分量对口红色号来说并不适用,有可能每个分量相差很小,而叠加起来的颜色和提取到的颜色并不相似,在颜色的比对上需要手动调参。
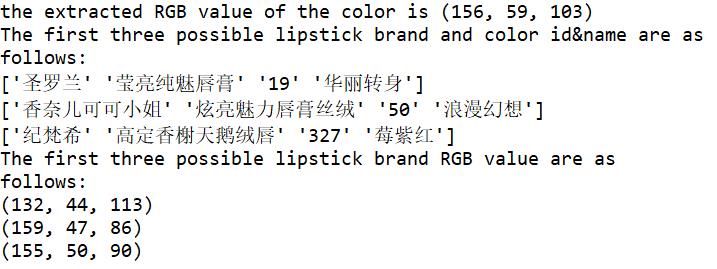
几经波折,最后输出的结果还是可以接受的,上图人像中涂的口红色号,感兴趣的读者可以查下正好是下面输出排名第一的口红信息。
误差分析
对于我们测试的图片信息,标记了嘴唇区域的特征点,我们提取到的 RGB 值(156,59,103)颜色如下所示:

可以看到和图片的颜色已经十分接近了,而数据集合 lipstick.json 中这种口红存储的 16 进制颜色值为 #842C71,对应的颜色如下:

明显看到数据集存储的颜色和实际照片的颜色是有些许误差的,而在本文算法实现过程中,又不可避免的有以下误差:
嘴唇区域截取不可避免会截取到皮肤中的一部分颜色,虽然算法已经将那种可能降到最低。颜色提取上,虽然截取多个嘴唇图片求平均值,但是本身的提取算法还是和实际值稍有偏差。RGB 颜色相似度比对的算法也不够精确。最最重要的是,照片必须是原图,而且光线要自然,加了滤镜的图是怎么也不可能识别出来的。以上种种,使得让计算机快速高效地识别不同的口红色号还是有困难的,原来计算机有时候也会很直男。
实时人像口红色号预测
看到这儿,可能很多读者朋友想实时地试一下能不能让计算机判断自己的口红色号,这对于 OpenCV 这一强大的图形操作库来说,不是什么问题。
它可以打开你的摄像头,读取每一帧的图片,结合前文提到的人脸识别代码,可以实时地截取到嘴唇区域的图片,然后交给计算机预测,从此再也不怕女朋友的灵魂拷问!

最后,附上打开摄像头的代码,快叫女朋友过来试下吧!
#coding=utf8\nimport cv2\nimport time\nprint('Press Esc to exit')\nimgWindow = cv2.namedWindow('FaceDetect', cv2.WINDOW_NORMAL)\nimport sys\nimport os\nimport dlib\nimport glob\nimport numpy\nfrom skimage import io\ndef detect_face():\n capInput = cv2.VideoCapture(0)\n #nextCaptureTime = time.time()\n faces = []\n feas = [] \n if not capInput.isOpened(): print('Capture failed because of camera')\n while 1:\n ret, img = capInput.read()\n gray = cv2.cvtColor(img, cv2.COLOR_BGR2GRAY)\n gray = cv2.equalizeHist(gray)\n time=0\n eTime = time.time() + 0.1\n detector = dlib.get_frontal_face_detector() \n predictor = dlib.shape_predictor('shape_predictor_68_face_landmarks.dat')\n dets = detector(gray, 1) \n print("Number of faces detected: {}".format(len(dets)))\n for a in dets: \n cv2.rectangle(img,(a.left(),a.top()),(a.right(),a.bottom()),(255,0,0))\n for index, face in enumerate(dets):\n print('face {}; left {}; top {}; right {}; bottom {}'.format(index, face.left(), face.top(), face.right(), face.bottom()))\n shape = predictor(gray, face) \n for i, pt in enumerate(shape.parts()):\n #print('Part {}: {}'.format(i, pt))\n pt_pos = (pt.x, pt.y)\n cv2.circle(img, pt_pos, 2, (255, 0, 0), 1)\n cv2.imshow('FaceDetect',img)\n if cv2.waitKey(1) & 0xFF == 27: break\n capInput.release()\n cv2.destroyAllWindows()\nif __name__ == "__main__": \n detect_face()\n
好啦,佳期如梦,双星良夜,在一个充满爱意的日子里,定位好女神常用的口红色号,和那个她来场华丽的邂逅吧!
作者:宁静
编辑:陶家龙、孙淑娟
出处:转载自微信公众号大数据文摘 (ID:BigDataDigest)
版权声明:CosMeDna所有作品(图文、音视频)均由用户自行上传分享,仅供网友学习交流。若您的权利被侵害,请联系删除!
本文链接://www.cosmedna.com/article/538791264.html